How to use Confluence for documentation: 6 steps to success
Share on socials
How to use Confluence for documentation: Six steps to success

Jump to Section
Jump to section
What is documentation?
Why is documentation important?
Why should you use Confluence for documentation?
How to create documentation in Confluence
- Step 1: Create the framework
- Step 2: Use permissions
- Step 3: Make content visual
- Step 4: Improve navigation
- Step 5: Get it online
- Step 6: Gather feedback
Documentation best practices
Make your Confluence documentation user-friendly, clear, and interactive with our six-step guide and examples.
Confluence is an incredibly versatile tool with a number of different applications. Whether it’s used as a company wiki, department hub or co-working space, Confluence is ideal for remote work and in-person collaboration alike.
But Confluence doesn't have to stay within your company. It can also be used to create technical documentation for external users of your products. Here's how to organise documents in Confluence and keep them clear, user-friendly and interactive as possible.
Key Takeaways
- Technical documentation enhances user experience and influences customer decisions, making it a crucial part of your product strategy.
- Confluence is ideal for documentation thanks to its collaboration features, simplicity, and integration with Atlassian tools.
- Follow a 6-step approach to build great documentation:
What is documentation?
The term “documentation” (also known as technical documentation or software documentation) covers a wide range of information organised into documents. Documentation comes in many forms and can be used by many different teams and purposes. It displays and describes what a product is, how it works, and how to use it properly.
Here are some examples of what documentation can include:
- Product information
- Quickstart guides
- Installation instructions
- Administration guidelines
- Frequently asked questions (FAQs)
- Release notes
Why is documentation important?
Technical documentation plays an important role in the overall customer and employee experience (depending on whether your documentation is internal or external facing).
Externally, good documentation can influence purchase decisions, renewal rates, and customer satisfaction. This is only set to increase with the rise in millennial and Gen Z customers. According to an SDL survey, 41% of millennials search for online tutorials, 33% search for technical documents and manuals, and 72% say that product information affects how they perceive a product. That makes it even more important to focus on your documentation now and into the future.
Internally, creating good documentation is just as crucial. A survey by Adobe found that nearly 3 in 4 employees say their work is negatively impacted by poor digital organisation, with 48% saying this impacts their ability to find specific documents quickly. Creating the right documentation - and having it easily accessible - helps onboard new hires, keep employees informed, and improve efficiency at work.
Why should you use Confluence for documentation?
Confluence is a platform built for teamwork, no matter where colleagues are in the world. Here are five reasons why Confluence is a great documentation tool:
- Centralised knowledge base: Confluence provides a single, accessible location for all documentation, helping teams easily find the information they need.
- Collaboration and teamwork: Teams can co-edit pages in real time, leave comments, and use Confluence templates to work together more efficiently.
- Version control: Confluence page history lets users track changes, compare edits, and restore previous versions with ease
- Permissions and security: Granular permissions give the right people access to the right pages, keeping sensitive content secure and promoting transparency.
- User-friendly interface: Confluence’s intuitive design makes it simple for anyone to create and manage content.
How to create documentation in Confluence: six steps to success
Step 1: Create the framework
To lay out the framework for your new documentation, you’ll need a space for it to live. Then, you’ll need to create and manage pages for your documentation.
To create a Confluence space, select Spaces > Create space. Then choose the Documentation space template (or create a Blank space to start from scratch).
In your new space, you can create individual pages for each piece of documentation. Just select “+ Create” > “Page” and start adding your content.
💡 Top tip: If you have pages in other spaces that you need to move to your documentation space, check out our guide on how to move Confluence pages.
What should I include in my Confluence documentation space?
Your content depends on what documentation you're creating. Here are a few examples to get you started:
Software documentation
- Product overview and key features
- System requirements and compatibility
- Installation and setup guides
- Configuration options
- Usage instructions (step-by-step)
- Troubleshooting tips and known issues
- Update and maintenance procedures
Company documentation
- Company mission, vision, and values
- Organisational structure and team directory
- Internal policies and procedures
- Onboarding guides for new hires
- HR policies (vacation, leave, benefits)
- Employee handbook
- Company events or cultural info
Financial documentation
- Budget plans and forecasts
- Profit and loss (P&L) statements
- Balance sheets
- Audit reports and compliance documentation
- Tax documents and filing procedures
- Expense policies and reimbursement processes
API documentation
- Authentication and authorisation methods (e.g., API keys, OAuth)
- Request/response examples (with code snippets)
- HTTP methods and status codes
- Parameters and query strings (with required/optional flags)
- Error messages and troubleshooting tips
- SDKs or client libraries (with links)
- Changelog or release notes
Product documentation
- Product vision and roadmap
- Feature specs and user stories
- UX/UI design files and research findings
- Competitive analysis
- Customer feedback and feature requests
- Release notes and launch checklists

Step 2: Use Confluence permissions to make pages more (and less) accessible
When you create new pages, you'll likely want to develop them over time, often with the input of other team members and stakeholders. When pages are still drafts, half-finished, or littered with comments, it's best practice to hide them not only from your external users but also from internal team members who don't need to provide input.
With that in mind, you should restrict permissions as soon as you create a new page. This might mean keeping draft content exclusive to select team members or restricting a public page to staff members until it’s ready to be accessible to the public. When you share pages with reviewers for their feedback, make sure you change their restrictions accordingly.
Step 3: Make your content more visually appealing
Technical documentation doesn't need to be dull or text-heavy. In fact, good documentation should feature plenty of images to help show users what they need to do. Use up-to-date screenshots, gifs, and video walkthroughs alongside text to annotate the key features and steps.
In addition to images, your documentation should be eye-catching, professional, and easy to read. This means using subheadings, bold text, and sections appropriately. Many companies design their documentation to match their website and overall brand identity - some Confluence macros can help with that.

⎯⎯
🔧 There's an app to help with that!
Mosaic: Content Formatting Macros & Templates lets you customise your pages and content to boost user engagement. Add buttons to draw attention, make links interactive, and design cards to display key information—plus much more!
FAQ tabs created using Mosaic
Once you've perfected your pages, it's time to focus on your Confluence site structure and navigation. You'll want to avoid orphaned pages and make sure there are prominent links between relevant sections.
Step 5: Get your Confluence documentation online
Time to take your space documentation public? You’ll need to use an add-on like Scroll Viewport to publish directly to the web, adding a customised web layer on top of the Confluence documentation. This means end users can view your Confluence documentation as a stylised website - without compromising your internal Confluence user interface.
Step 6: Seek out user feedback
Any UX designer knows that a good website is one that users want to interact with and engage with, and your documentation should be no different. It’s important to give users the chance to share their feedback.
⎯⎯
🔧 There's an app to help with that!
With Forms for Confluence, you can embed surveys and polls to let users quickly rate and review content while they're still on the page.
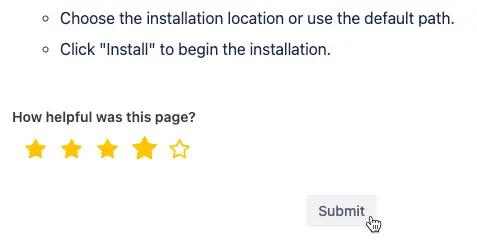
Whether it’s a simple star rating or a comment box, you'll get useful insights that can help make your documentation better than ever.
What are the best practices for managing Confluence documentation?
- Turn on restrictions during page creation: Unfinished documentation looks unprofessional and might even give users the wrong information. We recommend restricting page permissions to only those who need access until the pages are ready. When you share pages with reviewers for their feedback, don’t forget to give them access!
- Use comments to improve documentation: Inline comments can be extremely useful during the documentation drafting process. Just make sure to delete any comments before publishing your page.
- Use an app to improve Confluence document management: Keeping on top of your content can be difficult. Comala Document Management helps you manage, update, and review pages to keep everyone aligned.
Learn more: Five best practices to improve documentation
Create better Confluence documentation with our apps
Whether you want to make more engaging pages, improve user navigation, or gather user feedback, we've got the app to help you do it.
Related Content
Read more


Written by
Related Content
Read more