How to create and customise tables in Confluence Cloud
Share on socials
How to create and customise tables in Confluence Cloud

Jump to Section
Jump to section
How to create a table in Confluence Cloud
How to delete rows and columns
How to insert rows and columns
How to resize a Confluence table
How to copy and delete whole tables
How to customise Confluence tables
The table is a classic way of ordering information for a reason. Here’s how to create and edit your own Confluence tables.
When you want to present information in an organised format that allows for comparison and filtering, a table is a classic way of doing just that. Fortunately, Confluence has a simple tool for you to make and customise your very own table.
For another way to add structure to your page, read our guide to adding numbered headings to Confluence.
For another way to add structure to your page, read our guide to adding numbered headings to Confluence.
How to create a table in Confluence Cloud
1. Go to your chosen Confluence page.
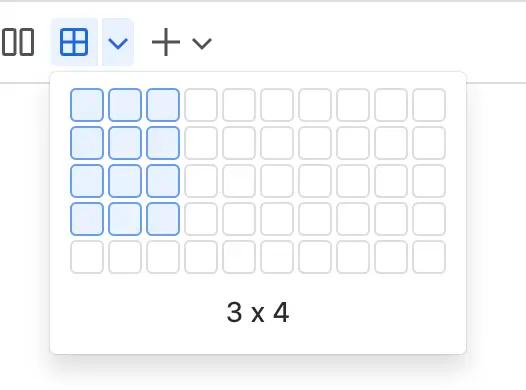
2. Find the Table icon in the toolbar. It looks like a square split into four sections. Then click the Table size arrow beside it.

3. Choose how many rows/columns you want, then click to confirm.
How to delete rows and columns
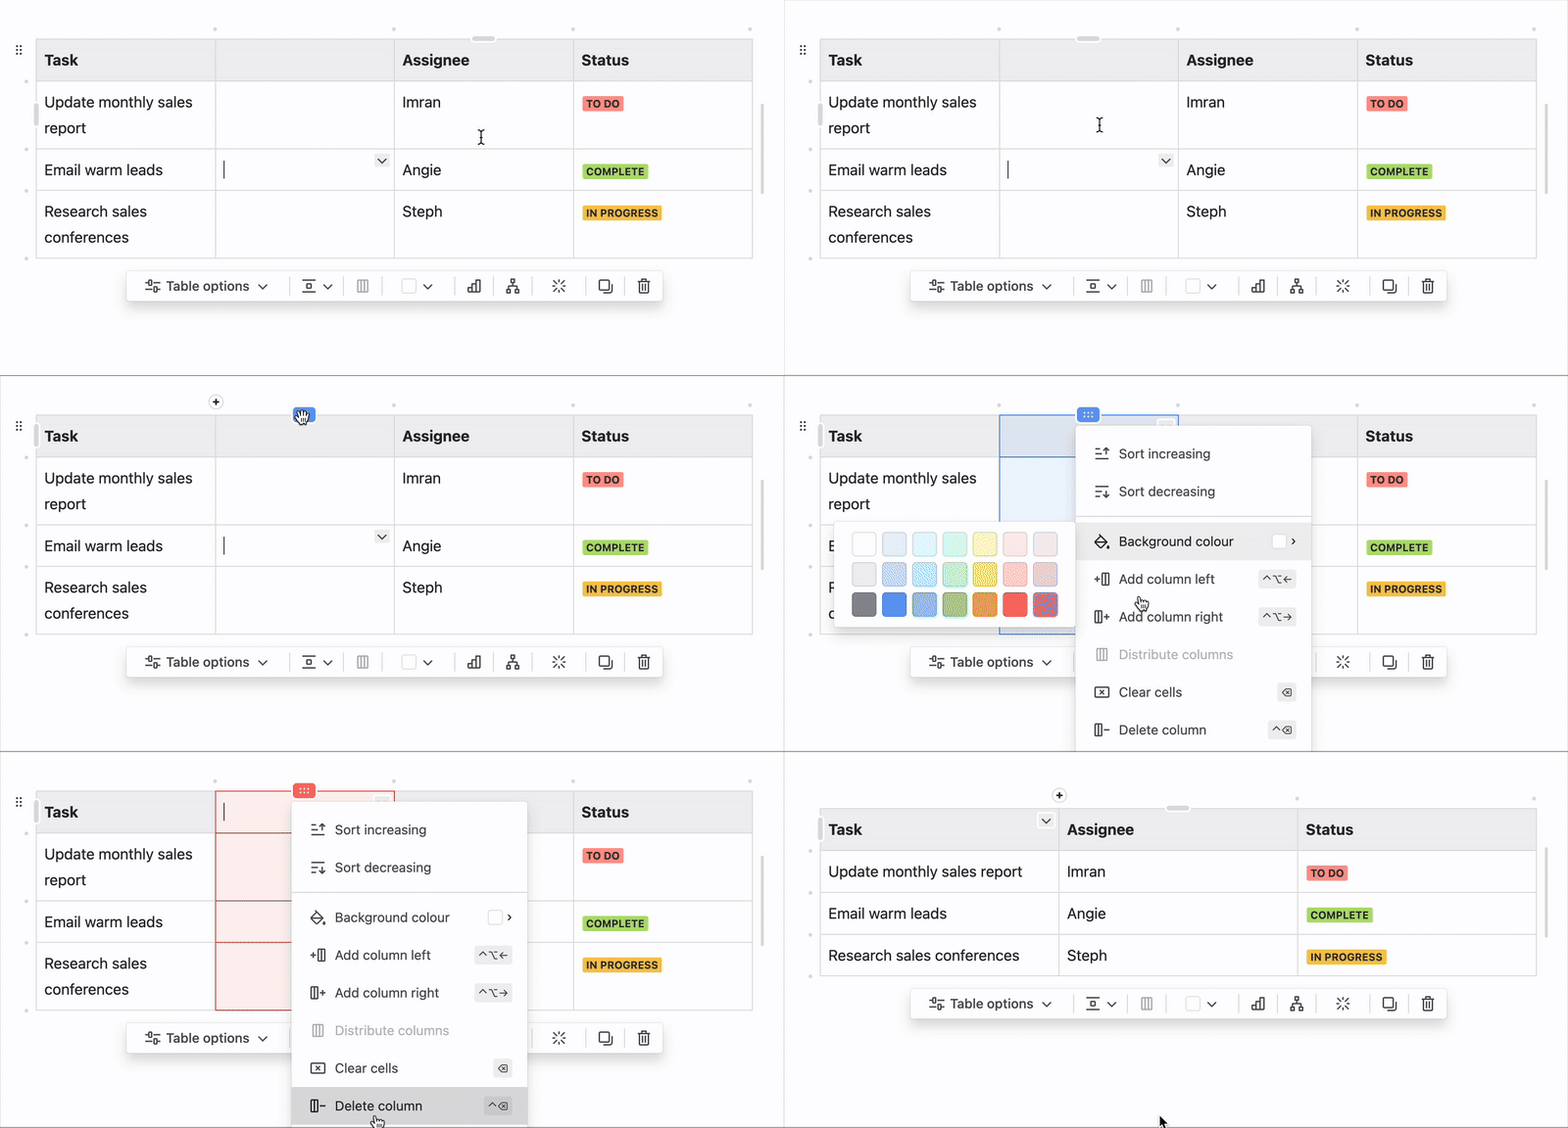
1. Hover over a column or row. Click the icon that appears at the head of that column or row.
2. Select Delete column or Delete row in the dropdown.
How to insert rows and columns
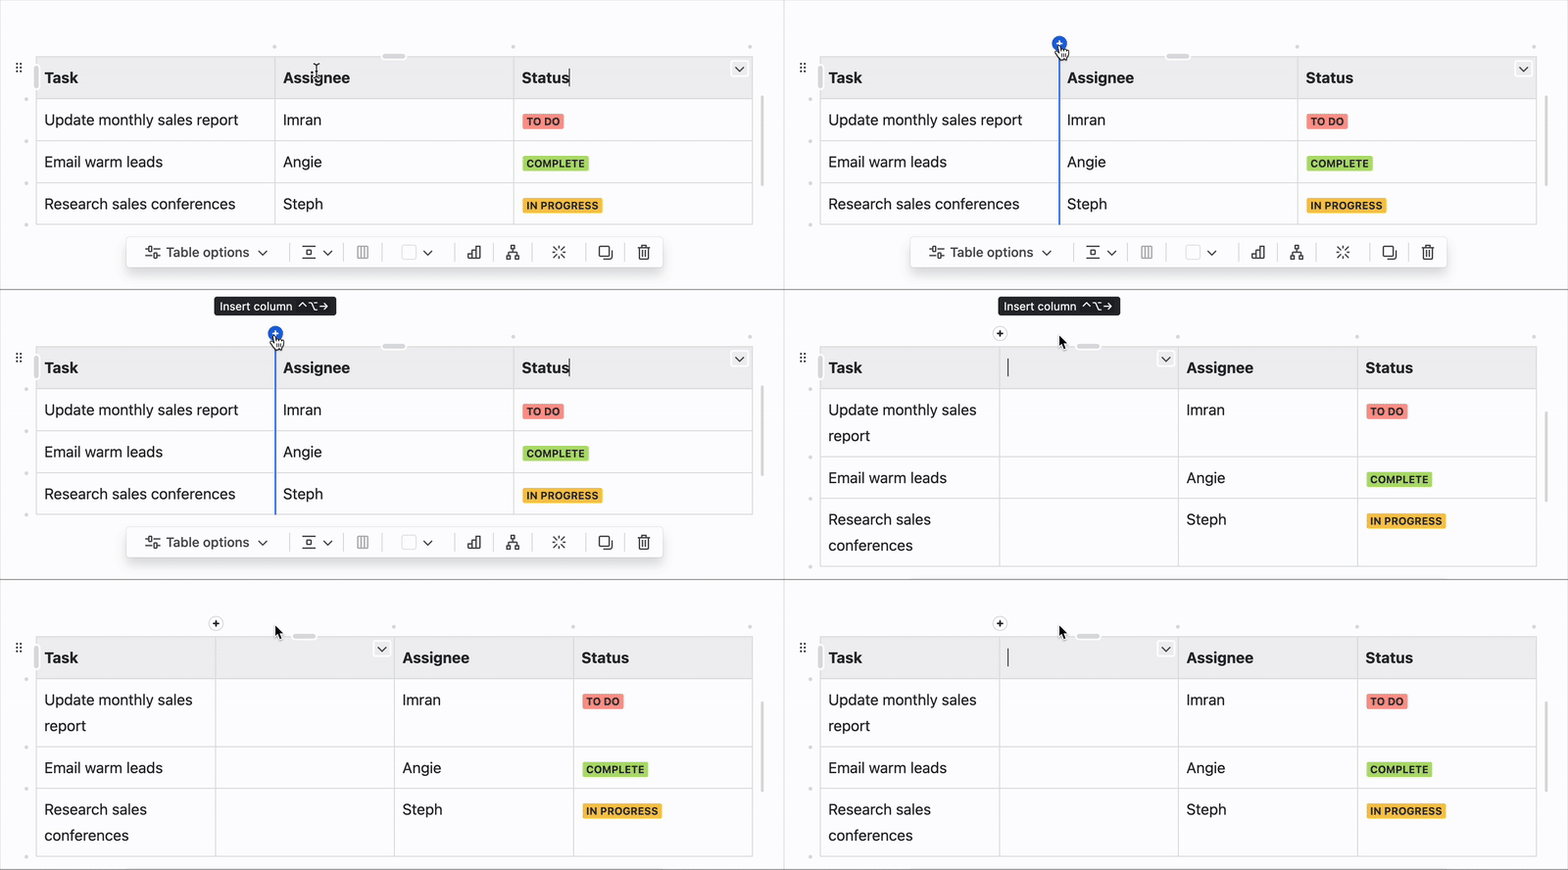
1. Hover over one of the dots between two columns/rows.
2. When it turns to a blue plus, click it. This will add a new column/row.
💡Pro tip: Use a Confluence keyboard shortcut to add a new row or column without clicking.
- Use CTRL + Alt + ← / → to add a column to the left or right of the current column (for Mac users, it’s ⌃ + ⌥ + ← / →).
- Use CTRL + Alt + ↑ / ↓ to add a row above or below the current row (for Mac users, it’s ⌃ + ⌥ + ↑ / ↓).
How to resize a Confluence table
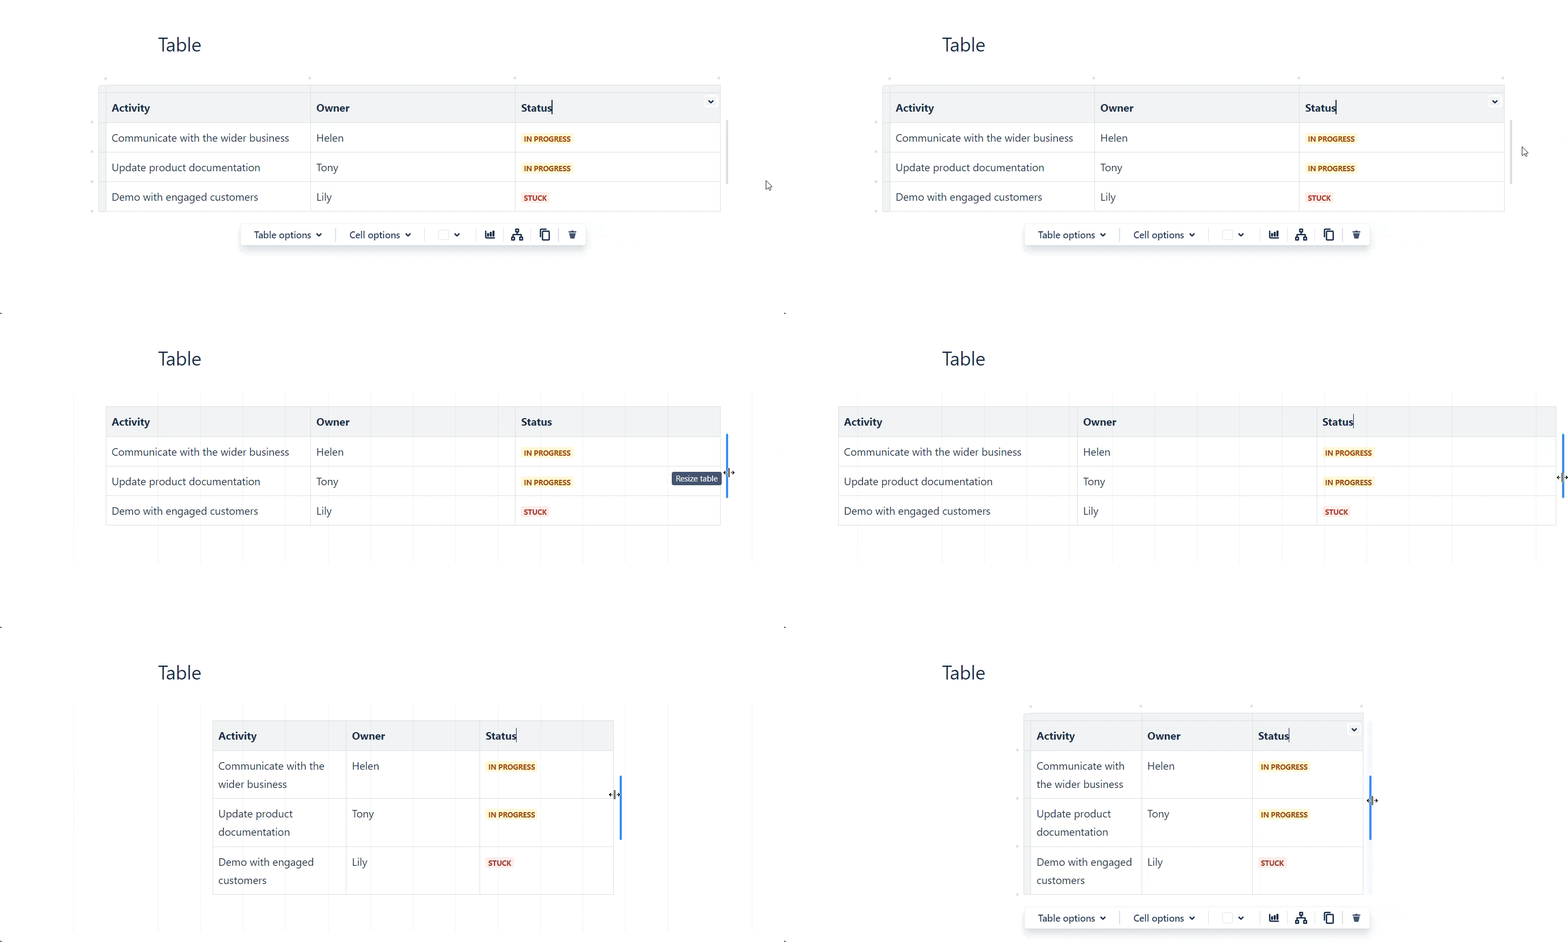
You can resize your table by clicking the Resize table line to the right of the table (it’ll turn blue when you hover over it) and dragging it to alter the width.
How to copy and delete whole tables
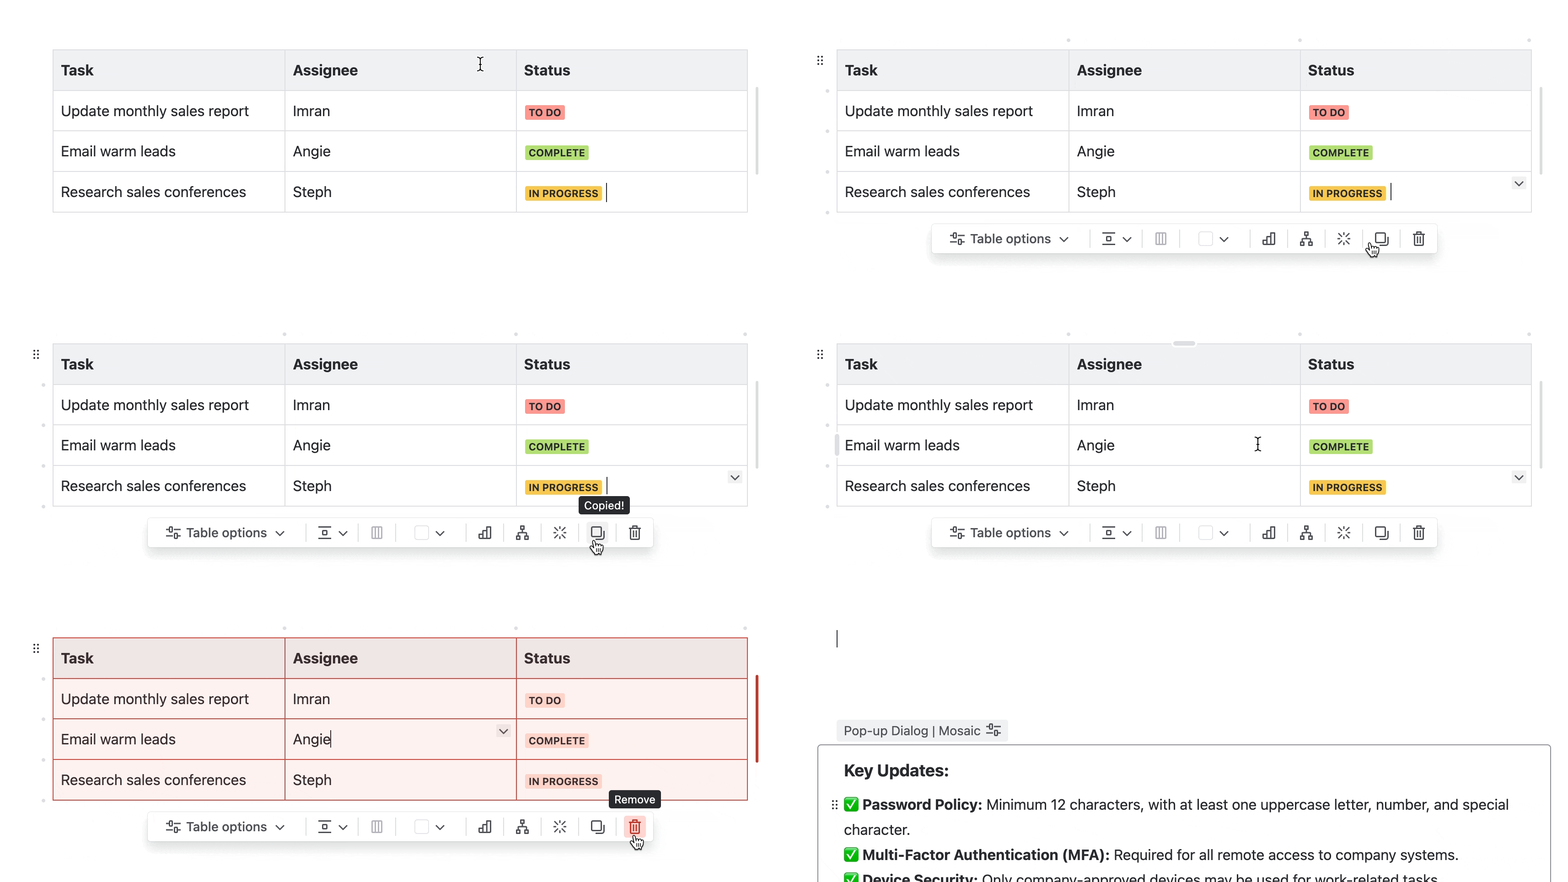
- To copy a table, click anywhere in the table. Then, click the Copy icon from the toolbar below the table. You can now paste your table anywhere else.
- If you want to delete a table, follow the same steps but click the Remove (trash can) icon from the toolbar below the table.
How to customise Confluence tables
There are many ways you can improve the look and feel of your Confluence tables. Here are just a few:
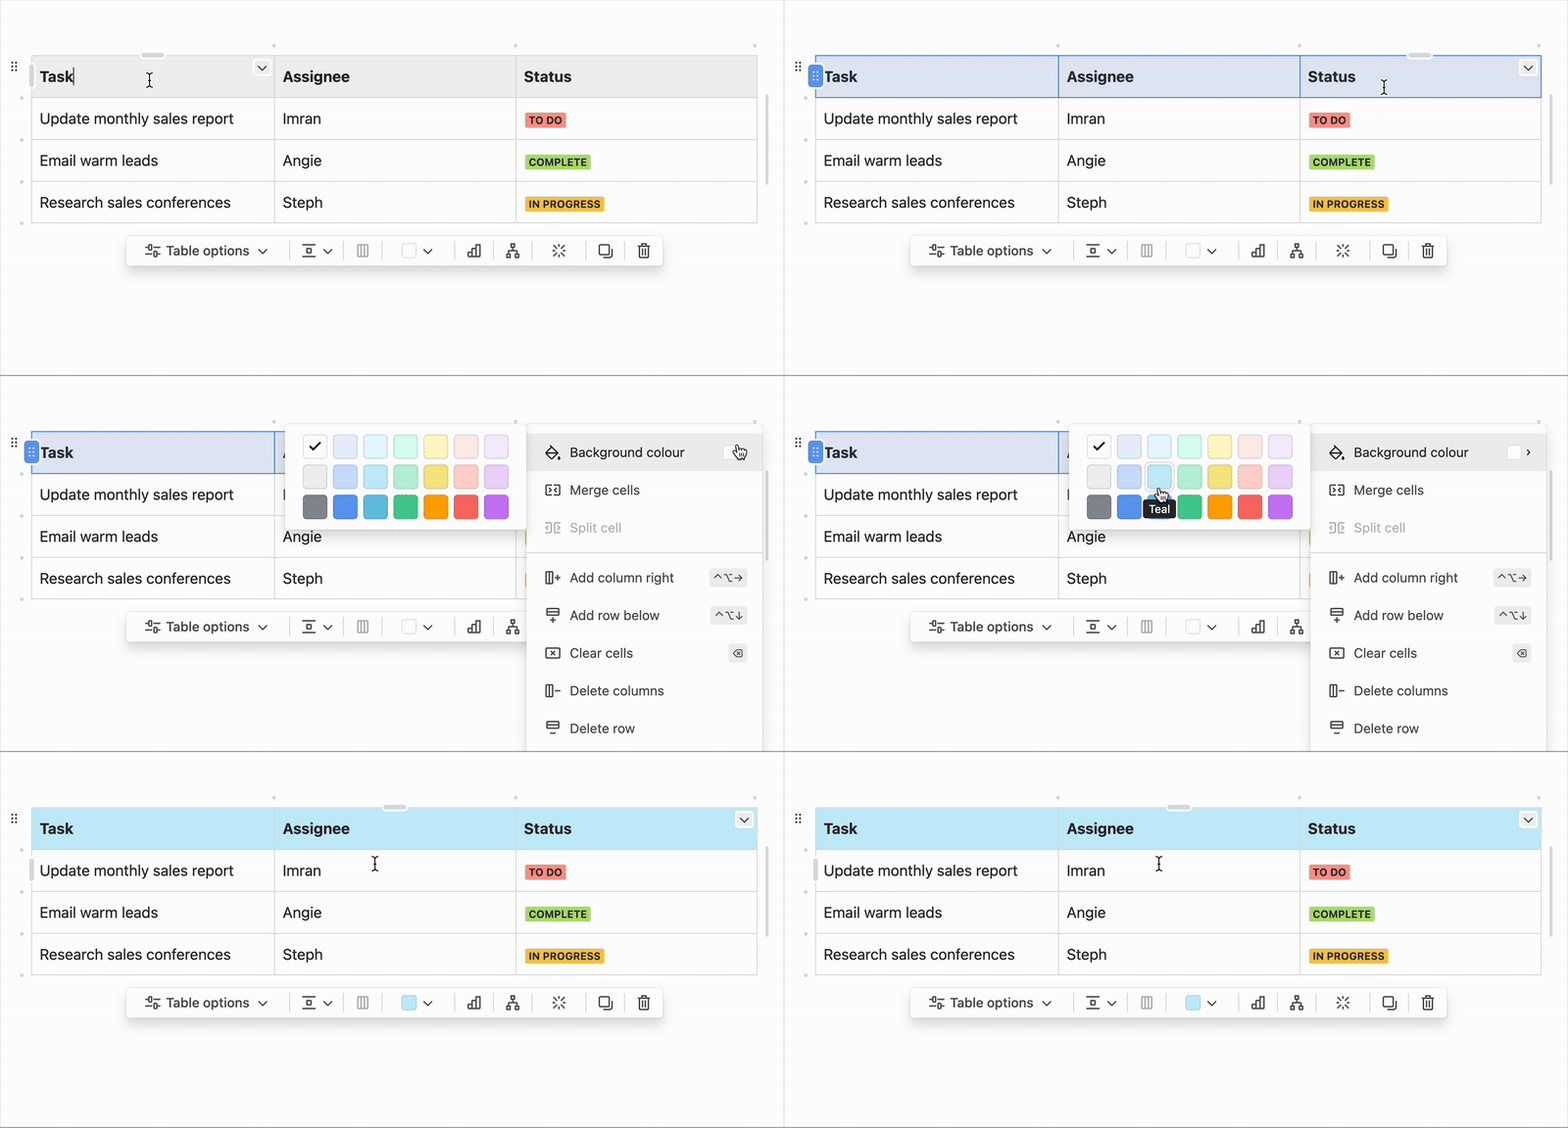
Change the colour of your table cells
1. Click on a single cell, or drag your cursor over multiple cells.
2. Click the downward arrow.
3. Hover over Background color and choose a colour from the palette.
Add a status to a table cell
1. Click in a table cell and type the /status shortcut.
2. Click Status from the dropdown menu.

⚡️ More advanced customisation options
If you're looking for more advanced customisation, you'll need an app to help you! Mosaic: Content Formatting Macros & Templates includes a variety of macros designed to improve your page structure and style.
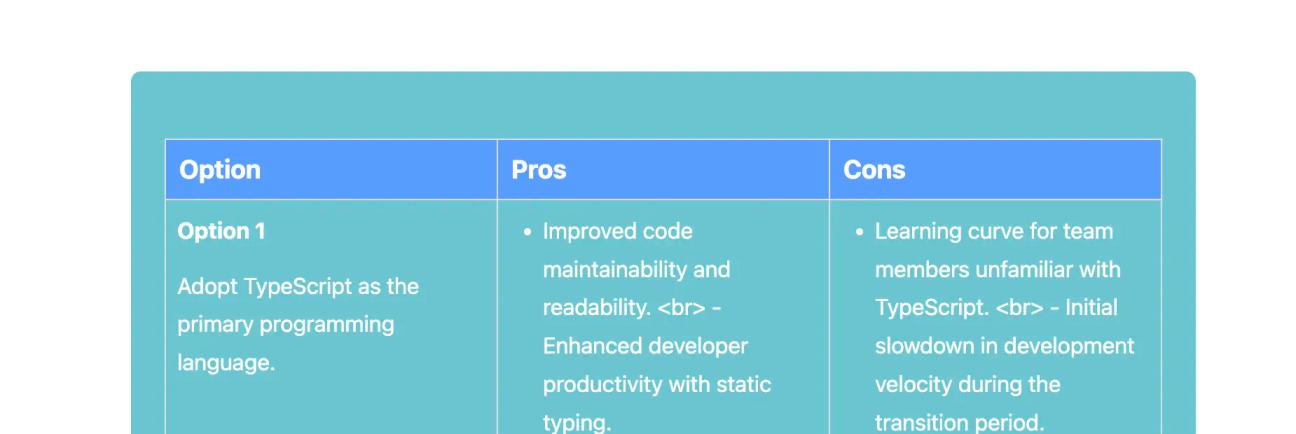
Make your tables stand out - add a coloured background with Mosaic
Here are some ideas for how to use Mosaic's macros with a table:
- Add collapsible sections inside table cells: Add an Advanced Expand macro to your table when a cell contains too much information, keeping it neatly tucked away.
- Separate tables with tabs: Too many tables can be hard to navigate. Adding tables inside the Tabs macro helps keep your overall page tidy and clean.
- Add more engaging links to tables: Buttons make it easier for users to click through to another page or document. For example, adding links to onboarding documentation on an onboarding checklist.
- Explain jargon: If your table includes terms that users may be unfamiliar with, a tooltip provides more information without making cells look busy.
- Add context with visuals: Pictures can dramatically improve comprehension. For example, adding cards with employee headshots can greatly enhance a team page.
See all these examples in action below 👇

Now you know how to create Confluence tables, it’s up to you to decide how to use them!
Enhance the structure and readability of your Confluence pages
Mosaic: Content Formatting Macros & Templates is the ultimate toolkit for making your pages easier to read and navigate. Get started today with a 30-day free trial.
Related Content
Read moreWritten by
Related Content
Read more


