How to apply custom colours to page text in Confluence Cloud | Formatting 101
Share on socials
How to apply custom colours to page text in Confluence Cloud | Formatting 101


Jump to Section
Jump to section
How to add custom colours to page text
Option 1: No HTML
- Quickly add brand colours to text
Option 2: HTML macro
Use cases for custom colours
TL;DR
Learn how to apply custom colours to your text in Confluence Cloud. It takes less than two minutes!
Have you recently migrated to Confluence Cloud and need a wider colour palette for your page text?
While Confluence Cloud’s built-in functionality only supports 18 colours, with the help of Mosaic for Confluence, you can format text in whatever colour you want.
Our guide covers HTML and no-HTML options, meaning even your less technical users can enjoy custom formatting without feeling intimidated.
How to apply custom colours to page text
It's possible to create custom colours with or without HTML, depending on your knowledge. Both use Mosaic for Confluence, so get your 30-day free trial and then read on:
Option 1: No HTML
⏰ Setup time: 2 minutes or less
○ App: Mosaic for Cloud
○ Difficulty: Easy
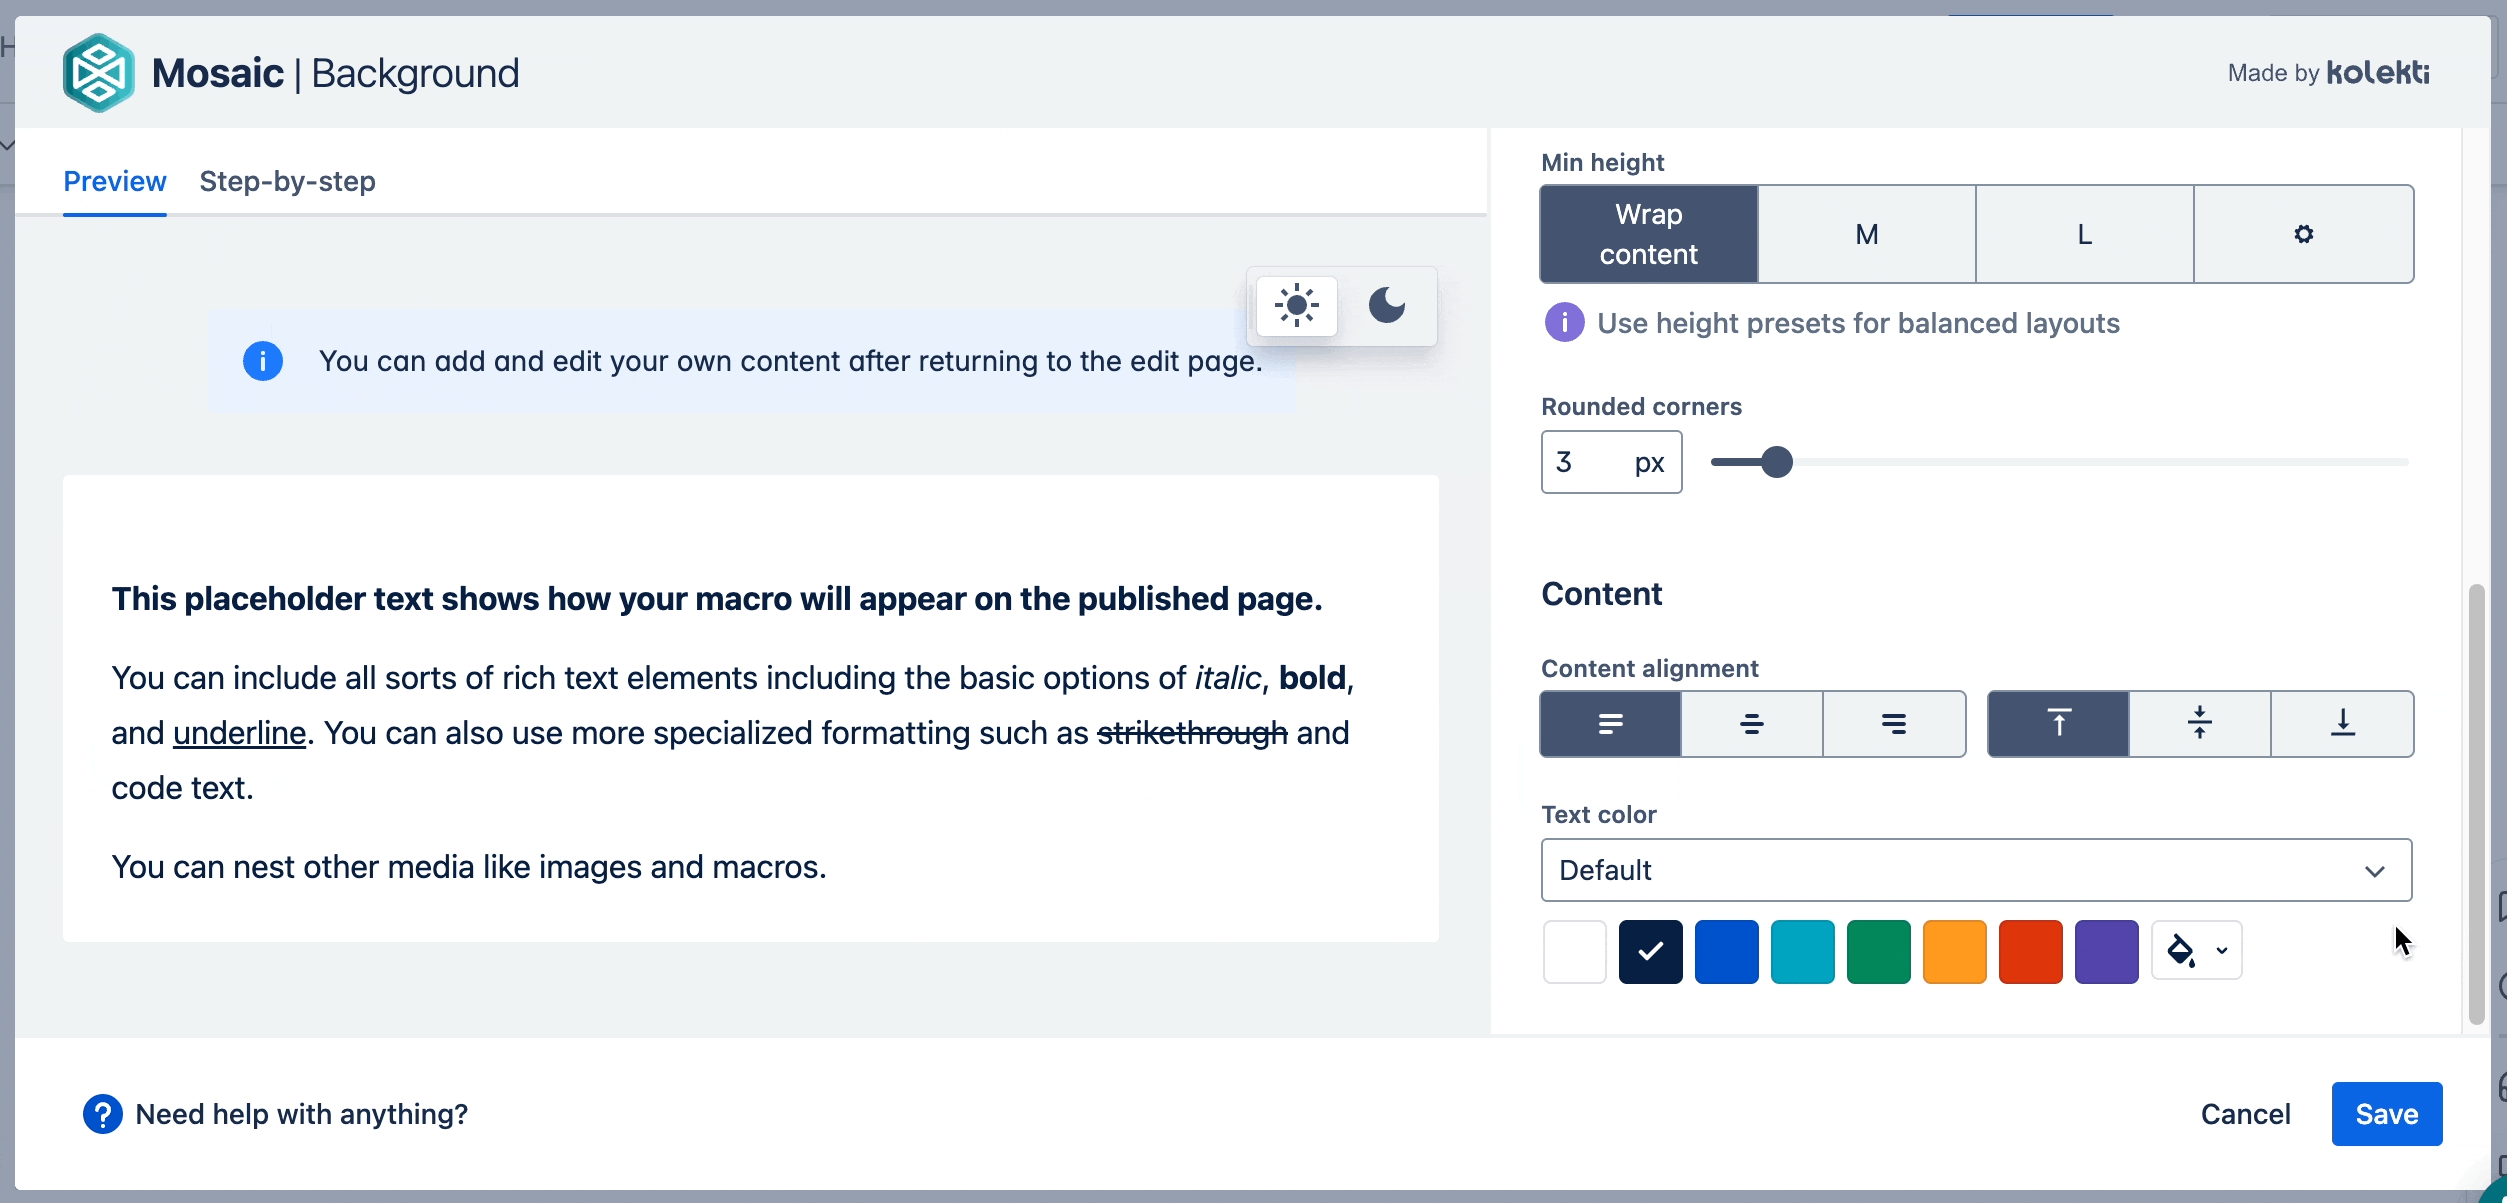
To apply custom text colours without HTML, we’ll be using the Background macro that comes with Mosaic.
- In edit mode on your Confluence page, type /background. Select the Background macro from the dropdown.
- Navigate to Text colour and do one of the following:
- Choose a pre-defined palette from the dropdown menu or
- Create a custom text colour using the Paint Bucket tool.
- Select Save to close the editor.
- Type or paste your text into the macro body.
- Click Publish or Update to see the results!
How to quickly add your company colours to text
While the Background macro lets you change text to any colour you want, remembering and typing in your brand's colours can be time-consuming.
Mosaic Advanced Edition solves this dilemma with a built-in brand kit, meaning you can add logos and preset colours to a palette in Confluence.
When you add a Background macro to your page, simply click the dropdown menu above the 'Text colour' palette and pick your company's assigned colours. That's it! No more hassle or remembering hex codes.
📝 Note: You'll need to be an admin to first set up the brand kit. When it's ready to go, everyone in your instance will have easy access to your preset palettes.
Option 2: HTML macro
⏰ Setup time: 4 minutes or more
○ App: Mosaic for Cloud
○ Pre-requisites: Familiarity with HTML and CSS
If you want to completely customise your content, you can use Mosaic's HTML macro to create text exactly as you want to. For example, want to change the colour and font, and add a custom border? You can do that!
If you're used to styling with HTML and CSS in Confluence Data Center and Server, this option is ideal for you.
If you're used to styling with HTML and CSS in Confluence Data Center and Server, this option is ideal for you.
- In edit mode, type /html and click the HTML macro from the dropdown.
- In the HTML tab, add your text and format the HTML.
- In the CSS tab, style the text however you want.
- Click Save, then Publish or Update your page.

f
Why should I use custom text colours in my content?
Adding custom text colours to your page can help you:
- Design engaging, impactful headings
- Add company branding to your pages
- Draw attention to important content
- Improve the page hierarchy
- Indicate task status/priority
- And much more!
TL;DR
- Custom text colours can improve company branding, make pages more engaging, and highlight text.
- Adding custom colours in Confluence Cloud is much quicker and easier than in Server or Data Center.
- With the Background macro, included in Mosaic, you can format text and imagery quickly and without any design or coding experience.
- If you're familiar with HTML and CSS, Mosaic's HTML macro is a great way to replicate the same text styling you're familiar with in Data Center. Not only can you add a custom colour, but you can also change the font, add a border, and much more.


Written by