
How to get started with Atlassian Rovo Agents
Share on socials
How to get started with Atlassian Rovo Agents

Jump to Section
Jump to section
What are Rovo Agents?
3 examples of Rovo Agents
Where to find Rovo Agents
How to make a custom Agent
What are Agent actions?
How to edit an Agent
How to delete an Agent
Take control of your tasks in Confluence and Jira. Discover Rovo Agents, your new tailored, AI-powered assistants.
Are you bogged down with repetitive routine tasks when working in your Atlassian instance? It's time to say hello to Agents. They're one of the tools included in the Atlassian Rovo suite and are designed to help you get your tasks done faster.
If you're not sure where to get started, we're here to help! Our guide explains what Agents are, what you can use them for, and how to create (and edit) your own.
If you're not sure where to get started, we're here to help! Our guide explains what Agents are, what you can use them for, and how to create (and edit) your own.
What are Atlassian Rovo Agents?
Agents are specialised AI teammates designed to help you with particular tasks in Confluence and Jira Cloud. Each Agent is built to focus on one specific area,such as summarising customer insights, creating social posts, and tracking project updates. You interact with Rovo Agents as you do with any AI chatbot - by sending them messages.

Rovo's Agents are plugged into your Atlassian apps and content. If you open an Agent on a specific Confluence page, the Agent can refer to the page for more context and use the information in its output.
3 examples of Rovo Agents (and how to use them)
Rovo comes with many prebuilt Agents created by Atlassian. We've highlighted a few below - click on a section to learn more.
1. Social Media Writer
What it does: Quickly generates social media posts or teaches you how to improve your existing social media content.
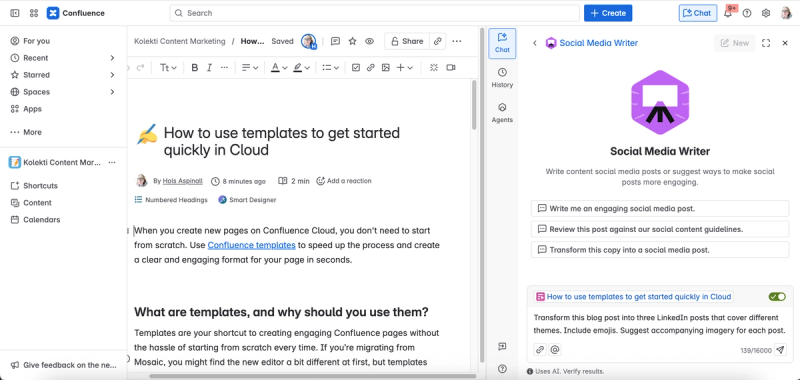
How to use it: Tell the Agent what you want to achieve, such as how many posts you need, the topic(s), and your brand tone of voice. You can even ask it to pull from a particular page to repurpose the content into posts.
2. OKR Generator
What it does: Reviews your draft objectives and key results (OKRs), shares resources and advice on writing good OKRS, or creates OKRs from scratch for your company or team.
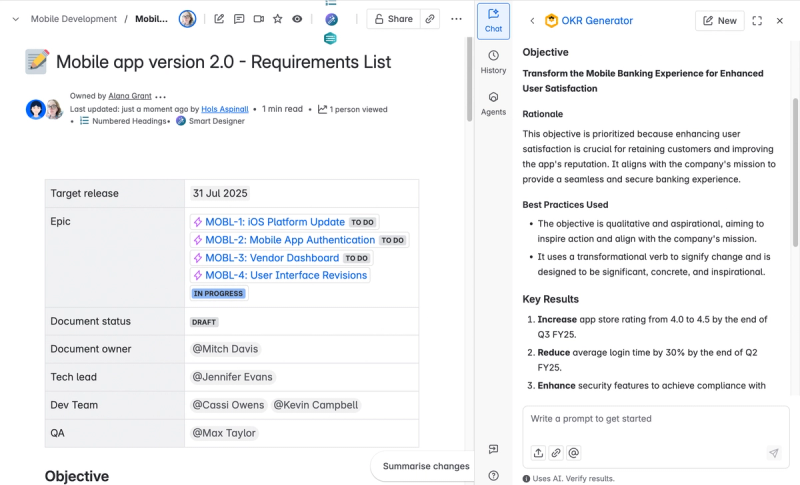
How to use it: To create (or refine) OKRs from a page’s content, navigate to that page and then direct the Agent to assist you. For example, you could ask, “Can you review the OKRs on my page?” to get insights on how to improve them.
3. Teamwork Trivia Host
What it does: Creates a personalised quiz based on your team’s recent work. This is great for onboarding, as it helps new hires understand colleagues’ roles and responsibilities in an engaging way.
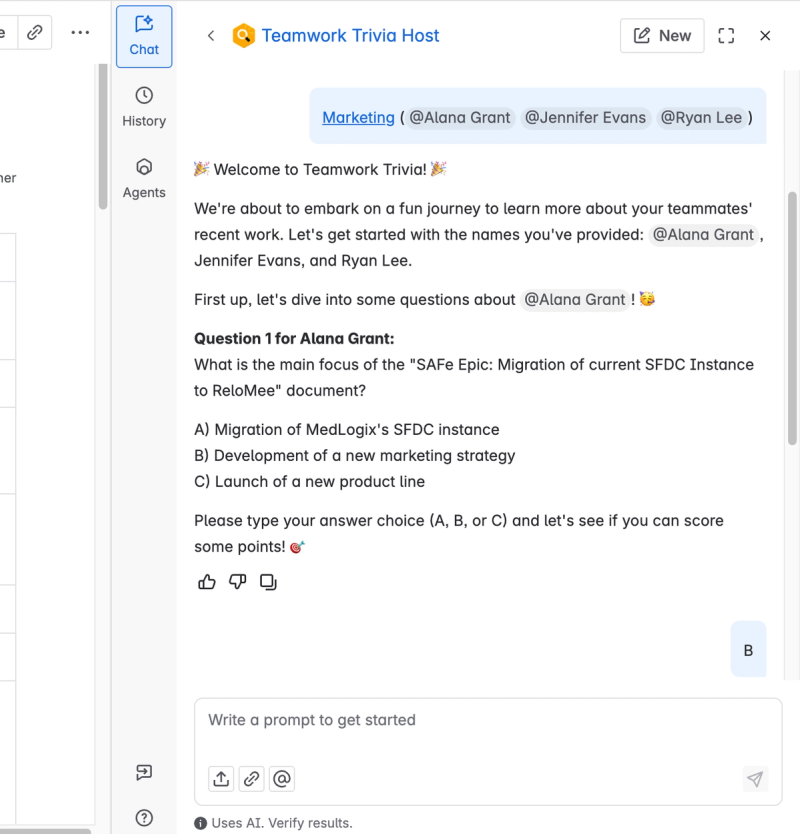
How to use it: Open up the Agent and tag your team members using @ (you can add up to three team members at a time), then ask it to begin the quiz. The Agent will automatically create a multiple-choice quiz to help familiarise you with your team’s recent work.
Where do you find Rovo Agents?
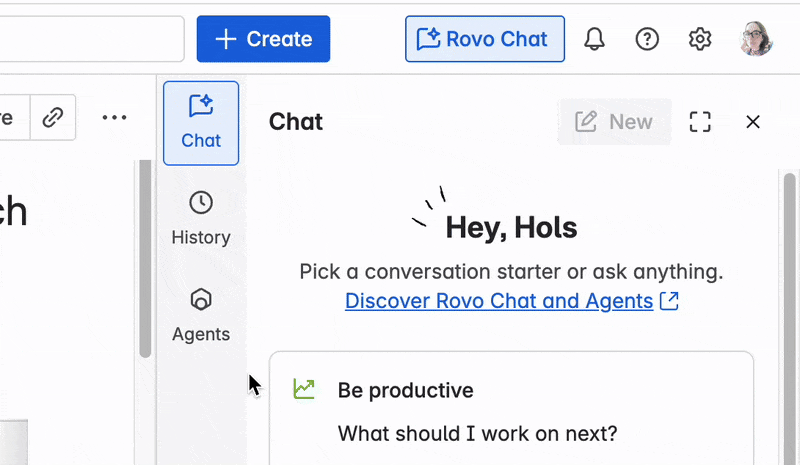
- Click ‘Rovo Chat' (or 'Chat’) in the top-right corner.
- Select ‘Agents’ from the chat sidebar.
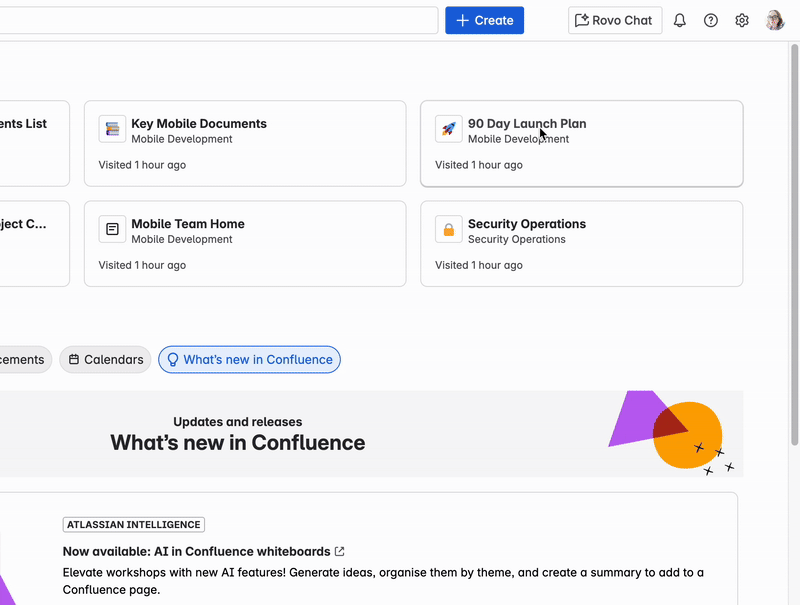
From here, you can browse through all the available Agents. If you can’t find an Agent that fits your requirements, you can easily make one.
How to make your own Rovo Agent
Though you can also create an Agent using Rovo Studio, it's easiest to do via Rovo Chat.
- Click ‘Rovo Chat' (or 'Chat’) in the top-right corner.

2. In the chat sidebar, select ‘Agents’, then click the ‘+ Create’ button.
3. In the chat box, give the Agent creation tool an overview of what you want your Agent to do, as well as its personality and tone.

The Agent creation tool will ask you further questions, such as:
- What you’d like to call your Agent
- What specific goals and knowledge your Agent should be aware of
- The particular tasks or requirements your Agent will be undertaking
- Anything your Agent should emphasise and anything it should avoid
4. When you've provided all the information needed, click ‘Next’ in the top-right corner.

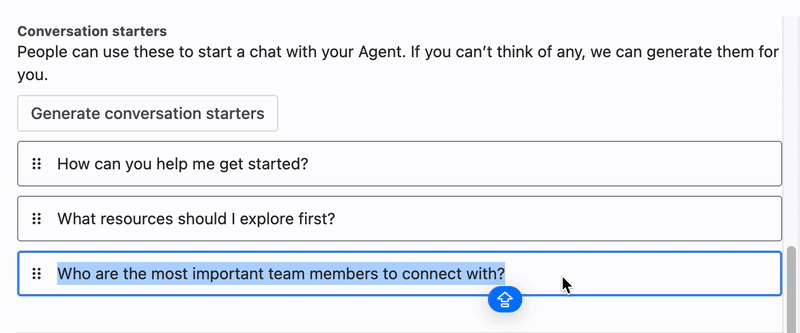
5. Before you finish, you can make adjustments to your Agent’s custom instructions. You can also:
- Change the conversation starters (or auto-generate new ones)
- Toggle 'Only reference these sources' to restrict which sources your Agent can access
- Add actions - these are specific tasks your Agent can perform
6. When you're done, click ‘Create’ in the top-right corner.

That’s it! To find your new Agent, click ‘Chat' in the top-right corner, then select ‘Agents’ > 'My Agents’.

What are Agent actions?
Actions are specific tasks that you can give your Agent permission to do. You can add these when creating an Agent or when editing your Agent later on.
Agent Actions in Confluence
- Create a new page
- Edit an existing page
- Add a comment to the bottom of a page (not inline)
Agent Actions in Jira
- Create a work item
- Update a work item’s severity or priority
- Update a major incident tag
- Add a comment to work item
- Change the status of a work item
- Add an assignee to a work item
- Edit the summary/description of a work item
- Delete one or more work items
- Add multiple work items to a sprint
- Suggest parents (or epics) for a group of work items
- Present work items as Smart Links in Chat
- Add or remove labels from a work item
- Create a sprint in a Jira project
- Start a sprint in a Jira project
- Find work items with a similar summary(Jira Service Management)
- Draft a reply based on similar requests (Jira Service Management)
- Summarise a work item (Jira Service Management)
- Find the right person to assign to a work item (Jira Service Management)
- Suggest next steps to resolve a work item (Jira Service Management)
- Suggest the priority of a work item based on similar work items (Jira Service Management)
- Find similar request types to a request (Jira Service Management)
- Suggest escalation for a work item based on similar work items (Jira Service Management)
How do you edit a Rovo Agent?
📝 Note: You can only edit a Rovo Agent that you have ownership of. This also means you can’t edit built-in Atlassian Agents.
- Click ‘Rovo Chat’ (or ‘Chat’) in the top-right corner.
- Select ‘Agents’ from the chat sidebar, then click the ‘My Agents’ tab.
- Click the three dots on your Agent, then choose ‘Edit Agent’ from the dropdown menu.

From here, you can change:
- The Agent’s name
- Its owner
- The description
- Its instructions (detailed information that tells the Agent what its role is)
- Conversation starters (example questions that users can click as jumping off points)
- Where the Agent can pull information from
- Specific actions it can take
When you’re done, press the ‘Update’ button in the top-right corner.
How do you delete a Rovo Agent?
📝 Note: You can only delete a Rovo Agent that you have ownership of. This also means you can’t delete built-in Atlassian Agents.
- Click ‘Rovo Chat’ (or ‘Chat’) in the top-right corner.
- Select ‘Agents’ from the chat sidebar, then click the ‘My Agents’ tab.
- Click the three dots on your Agent, then choose ‘Delete Agent’ from the dropdown menu.

4. In the pop-up, click ‘Delete’ to confirm the deletion of your Agent.

Looking for a smarter way to create pages in Confluence?
Smart Designer, your Confluence page design wizard, lets you design engaging pages in seconds. Get it with a 30-day free trial of Mosaic: Content Formatting Macros & Templates.
Related Content
Read more


Written by
Related Content
Read more